Juice Diet: Day 5

Today is Day 5 of my juice diet! I am feeling energized and excited. Since Monday, I have lost 6 pounds!! I have also incorporated some great workout routines to my diet — thanks to Pinterest! I have also been using the My Fitness Pal app on my iPhone. Through the My Fitness Pal app you can create recipes, which is where I have been tracking about how many calories (and other nutrition info.) each juice contains. The My Fitness Pal app also helps you lose weight or maintain your current weight by keeping track of your weight, how many pounds you want to lose per week, and it gives you a goal for how many calories you can have per day. You can also scan food items for the exact nutrition info. They also have restaurant nutritional information. You can also put in your exercise information daily so that you can subtract calories.

For those of you who have not juiced before, it can be fairly expensive. The juicer itself can be expensive, I believe that I found a great juicer for a great price. Click here for the blog post where I have the link for my juicer and a lot of information for beginners who want to start juicing. Not only can a juicer be expensive, but buying all of the fruits and vegetables that you will need for your juices can be expensive too. I go grocery shopping every Sunday and I bought about 5 of each fruit and a few of each vegetable. I’m already running low on my ingredients and some of them I have used up completely.

Juicing definitely involves a lot of planning. This week, I created my juice recipes off of the top of my head the moment I wanted to make them. However, I already had an idea of what fruits and vegetables I like to use in my juices. If you’re new to juicing, research juice recipes (or my blog!) to see what kind of recipes you might like, what kind of fruit and vegetables you want to buy, and notice how much produce is used per juice. There’s a lot of produce used per juice!

However, despite the fairly expensive cost, juicing is very good for you. I am planning on doing a blog post soon that lists all of the benefits of juicing, and what else you can do with your juicer. So stay tuned!

BREAKFAST:

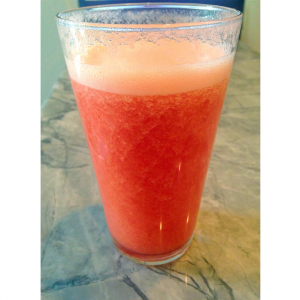
"Fruit Punch Juice"

“Fruit Punch Juice”

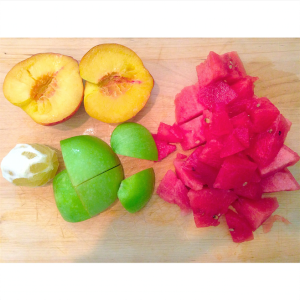
“Fruit Punch Juice” Recipe:

  • 1 peach
  • 1 lemon
  • Half of a Granny Smith apple
  • Watermelon (*Note: watermelon is usually already cut up and in a container in our fridge, because I love it so much, so I’m not sure exactly how much watermelon I put in this juice. Therefore, put all of your other ingredients in first and then fill the rest of your glass with juiced watermelon until your glass is full!)

LUNCH:

Day 5: Lunch

Day 5: Lunch

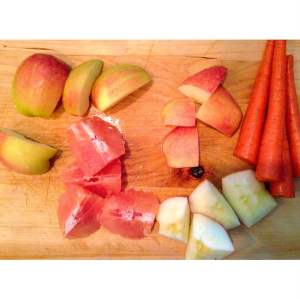
Recipe:

  • 2 Gala apples
  • 1 grapefruit
  • 4 medium carrots

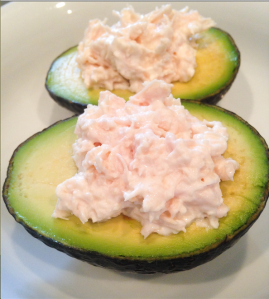
I also had half of my chicken stuffed avocado recipe.

Stay tuned!

xoxo, Megan
Juice Diet: Day 4

BREAKFAST:

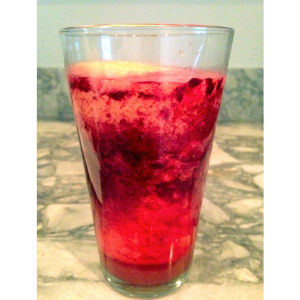
"Berry Orange Juice"

“Berry Orange Juice” Recipe:

  • 1 cup of blackberries
  • 1 cup of blueberries
  • 1 orange
  • 1/2 cup of strawberries (small ones)

LUNCH:

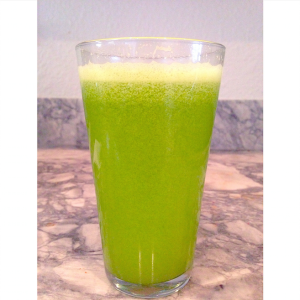
"Green Machine Juice"

“Green Machine Juice”

“Green Machine Juice” Recipe:

  • 1 1/2 Granny Smith apples
  • Half of a cucumber
  • 1 pear

SNACK:

For snack today, I had 1 cup of corn. 

DINNER:

For dinner I had four pieces of tempura shrimp and a side salad with light ranch dressing.

Stay tuned!

xoxo, Megan
Juice Diet: Day 1

Today is Day 1 of my Juice Diet. My rules for my juice diet are different than others. I allow myself to eat solid foods. I have  juice for breakfast and lunch and then I have a regular, small portioned, healthy meal for dinner. Or I have juice for breakfast, lunch, and dinner but with my lunch juice I have half of a sandwich and a small, healthy snack later in the day. I do juice diets so that I can cleanse my body, get some essential vitamins and nutrients in, and lose some weight. I plan on staying on this juice diet for a week or two. I still haven’t decided the full plan for my diet, I’m playing this first day by ear.

If you have never juiced before, check out my blog post about my first experience juicing here. You can also check out where I bought my juicer (which by the way is amazing and affordable!!) here.

BREAKFAST:

Breakfast: "Sunrise Juice"

Breakfast: “Sunrise Juice”

The picture above is the juice that I made for breakfast this morning, which was DELICIOUS!!

“Sunrise Juice” Recipe:

  • 1 cup of strawberries (cut the leaves off before putting in the juicer)
  • 1 cup of pineapple chunks
  • 1 pear (cut into slices, do not put the pear’s core in the juicer)

LUNCH:

photo 1

Lunch: "Rainbow Juice"

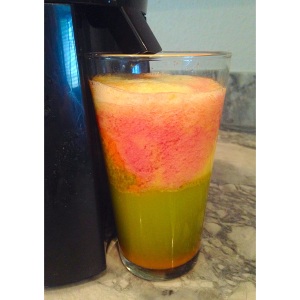
Lunch: “Rainbow Juice”

For lunch I had my “Rainbow Juice.” Making this juice reminded me of how much fun I have while juicing. Juicing makes you appreciate fruits and vegetables. Maybe I’m a little loopy from not having any solid foods yet today, but while cutting my fruits and vegetables I took a moment to step back and appreciate how pretty and colorful they all are. Juicing is fun for me because I can create my own, delicious recipes. I start by researching many different recipes online.  I tend to find that there’s always one vegetable in a juice recipe that I choose to steer away from. Side note: I’m not a big fan of vegetables but this is why I juice, so that I can squeeze in my veggies without really tasting them! Another side note: I love fruit!! So you will find that my recipes tend to have more fruit in them, but I’m trying to get a good fruit/veggie ratio I promise!

NOTE: The picture of my “Rainbow Juice” was taken before I stirred it because I wanted y’all to see why I call it Rainbow Juice…it doesn’t look like this once stirred! And you should always stir your juices!

“Rainbow Juice” Recipe:

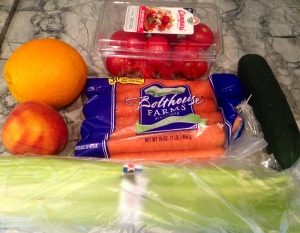
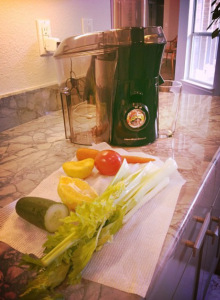
  • Half of 1 orange (peel and cut into slices that will fit in your juicer)
  • Half of 1 peach (cut into slices that will fit in your juicer)
  • 1 whole carrot (the big carrots not the baby carrots!)
  • 2 whole celery sticks
  • 1 tomato (I had to use two small tomatoes, my mom accidentally bought the small tomatoes instead of the regular size tomatoes)
  • Half of 1 cucumber

SNACK:

Day 1 Snack

Day 1 Snack

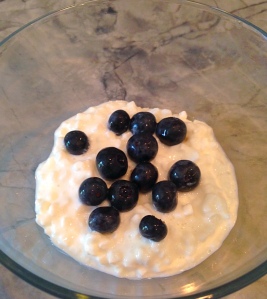
I prepared this snack right after I had made my juice for lunch. I was planning to eat it with my lunch juice but I was too full after my Rainbow Juice, so I saved this snack for later in the day!

Snack:

  • 1/2 cup of low fat cottage cheese
  • Several blueberries

DINNER:

Day 1 Dinner

Day 1 Dinner

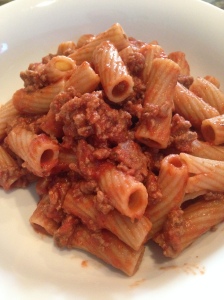
Turkey Rigatoni

Skinny Turkey Rigatoni

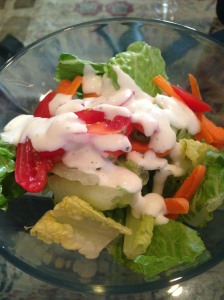
Like I said earlier, I allow myself to eat on my juice diet. I had juice for breakfast and lunch, a small snack, and a regular, healthy meal for dinner. I had a side salad which was a mixture of iceberg lettuce, sliced tomatoes, sliced baby carrots, and light ranch dressing. I also had a bowl of Turkey Rigatoni…

Skinny Turkey Rigatoni Recipe:

Ingredients:

  • Whole wheat rigatoni pasta
  • Prego Traditional marinara sauce
  • Ground turkey (*You’re going to want to take the ground turkey out of the freezer and let it sit on the kitchen counter to soften a little.)

Instructions:

  • Bring a large pot of water to boil.
  • While you are waiting for your water to boil, cook the ground turkey in a large skillet until it is about a medium brown. Be sure to break down the ground turkey into “crumbles” by stirring the ground turkey. *Make sure there  are no pink colored crumbles.
  • Once your ground turkey is completely brown, add pasta sauce and mix well.
  • Once water comes to a boil, add pasta and cook for about 8-10 minutes or until al dente; drain. Return to same pot.
  • Pour ground turkey and sauce combo into the pot of pasta and mix well.
  • Pour skinny rigatoni pasta into a bowl, serve, and enjoy!

I hope you enjoy all of the recipes for my first day of my juice diet! Stay tuned for much more!

xoxo, Megan

Recipe: Chicken Stuffed Avocado

You can trust me when I say that this is probably the easiest thing ever to make. I myself am not a gourmet chef by any means, but I wish I was! This recipe is really just a few simple steps, but the result is a super delicious and very filling meal! This is hardly a recipe, more like a few instructions, but I figured I would share with you all anyways because it’s one of my favorite meals!

What You’ll Need:

  • 1 large Hass avocado
  • 1 can (4.5 oz.) of Swanson White Premium Chunk Chicken Breast
  • Light mayonnaise

Instructions:

  • Use a knife to cut the avocado in half, throw away the pit, and place both halves in a bowl or on a plate.
  • Open the can of Swanson White Premium Chunk Chicken Breast and drain the water into the sink.
  • Once you have drained the can of water, fill it up with water from your sink and repeat the draining process. Do this at least two times, it helps remove some of the sodium from the can.
  • Once you have drained the can of Swanson White Premium Chunk Chicken Breast, dump it into a separate bowl.
  • Grab your mayonnaise of choice (I refer Hellman’s Light Mayonnaise) and scoop 1-2 spoonfuls of mayonnaise into the bowl with the chicken. I sometimes use 1 1/2 spoonfuls of mayonnaise, it just depends on your taste.
  • Mix the chicken and mayonnaise well.
  • Once the mayonnaise and chicken are mixed well, scoop it and stuff it into the hollowed areas of the avocado where the pit was.

Enjoy!

xoxo, Megan

Doing the Smart thing

Smart Barre in Alamo Heights (San Antonio, Texas)

Smart Barre in Alamo Heights (San Antonio, Texas)

Today I went to my first Smart Barre class! Smart Barre is a combination of yoga, Pilates, and ballet which targets the body areas in which women struggle: the core, hips, thighs, seat and arms. Smart Barre promises that in just 10 consistent classes, you will notice a change! If you ask me, that’s something worth achieving.

I signed up through the Smart Barre website the night before. Here is a list of their class schedule and prices for their various memberships. I purchased the Single class for $19. It’s a great deal!

The San Antonio studio requires you to come to class early, about 15 minutes, to fill out a short questionnaire. I would recommend signing up for a class online, or at your local studio well before you want to take the class. Smart Barre limits their class size to maximize each individual’s experience. So just know that if you come to the studio and sign up a few minutes before class time, the class might already be full. Click the picture below for a closer view of the Alamo Heights studio’s pricing.

Smart Barre Alamo Heights Pricing

Smart Barre Alamo Heights Pricing

Clothing Requirements:

  • Socks (non-slip exercise socks are recommended but not required)
  • Workout pants or capris
  • A tank top or T-shirt (it’s better to wear a fitted top)

My Experience:

I walked in the Smart Barre studio in Alamo Heights and was pleasantly surprised. The lobby was beautiful. White, clean walls and an array of their cute and trendy merchandise greeted me. The woman at the desk, Emily, who I later found out was the instructor for my class that day, was very pleasant and helpful!

I used to take ballet classes from age 3-6th grade. I have also taken several yoga and Pilates classes before at my local gym. I walked in thinking that it would not be very difficult for me. I was wrong, but in a good way! The class was great!! The class size was not too big and not too small. I personally received a lot of one-on-one help from the instructor. Like I said, I was wrong about it not being difficult, the instructor helped me a lot to correct my form and perform the exercises correctly.

After only a few exercises during the beginning of class, my legs were already shaking! The class was clearly split up into yoga, Pilates, and ballet exercises and we worked on strengthening and toning all parts of the body. Smart Barre includes exercises with low impact but high intensity. There was not a single part of the class that didn’t push me to work hard. The class included weights for strengthening exercises and a ball for abdominal exercises.

The consistent attention to perfecting your form while performing each exercise truly helped me get the most out of my workout experience. The class ended with some stretching and a calming yoga sequence, perfect way to end the class!

I really enjoyed my first Smart Barre classes and am looking forward to attending more classes!

xoxo, Megan

Healthy Living: Daily Greens Cold-Pressed Juice

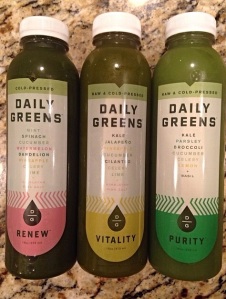
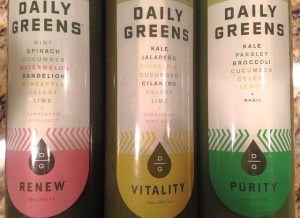
I recently stumbled upon Daily Greens Cold-Pressed Juice while I was shopping in Central Market. I was immediately intrigued and decided to buy six of them…oops. I figured that I could drink two juices per day, just to try the cleanse out.

I have tried a juice cleanse before (search my blog for the ‘Juicing: My Experience’ blog post) and I really do like them. However, until now I haven’t tried cold-pressed juices.

Introducing, Daily Greens Cold-Pressed Juices, the most amazing juice ever!

daily greens

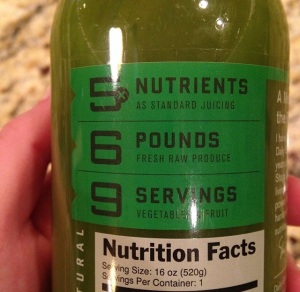
This juice comes in delicious flavors (see picture below)! My personal favorite thing about Daily Greens juices is that they are extremely good for you! Each bottle contains SIX POUNDS of fresh, raw produce, NINE SERVINGS of fruits and vegetables!! That’s insane! Those numbers are what immediately convinced me that I needed these in my refrigerator, and in my tummy!

daily greens 2

daily greens 3

Not only are the Daily Greens juices healthy for you, it all got started from a very interesting woman. Shauna Martin, Daily Greens’ founder, discovered her passion for green juice and all of its life-giving benefits following her battle with breast cancer. You can read more about Shauna Martin’s story at the link below.

http://drinkdailygreens.com/about-us/our-story/

Another great thing about Daily Greens, according to their website, is that a portion of Daily Greens’ sales are donated to organizations that assist young women battling breast cancer. So every bottle you drink makes you and many others that much healthier!

If you can’t find a grocery store near you that sells Daily Greens juices, you can order online through their home delivery service!

http://drinkdailygreens.com/shop/

You can also shop for a Daily Greens cleanse kit!

http://drinkdailygreens.com/cleanse/

Check out this amazing juice product and read more about it on their website at http://www.drinkdailygreens.com

xoxo, Megan

Juicing: My Experience

juicing

I first became obsessed with the idea of juicing after watching the documentary Fat, Sick & Nearly Dead on Netflix. Fat, Sick & Nearly Dead is a 2010 American documentary film about the 60-day journey of an Australian named Joe Cross. Cross decided to travel across the United States while maintaining a strict juice fast. He educates many Americans about the benefits of juicing, and even helps some people start their juice fast! I would highly recommend watching this interesting documentary!

Naturally, after I finished watching the documentary, I was enthused about the amount of weight Joe Cross was losing due to these fruit and veggie juices. So I decided to purchase my first juicer. At first, my mom thought I was nuts and insisted that I wouldn’t like it — I’m not a huge fan of vegetables, but am obsessed with fruit — but I ignored her doubt and decided to purchase a juicer.

Juicers can be very expensive. I did my research and searched various websites to find the best juicer at the best price. I finally stumbled upon the Hamilton Beach 67601A Big Mouth Juice Extractor from Amazon. Once I received my juicer I was thrilled! For such a low (great) price, I was worried that it might not be up to par with other expensive juicers, but I think it works just as great!

When I first began juicing, I did not have any intentions to do an all-out 60 day cleanse like Joe Cross did. Honestly, I just wanted to see if I could do it for a couple of days, maybe three. However, unlike Joe Cross who strictly only drank juice and did not eat food, I decided to make up my own rules for my cleanse.

My Experience:

I decided that since I was jumping into this whole cleanse trend, I wanted to have a little something to eat every day — I figured I might starve if I didn’t. I made my breakfast and lunch juices the night before and made my dinner juice during the day. I planned on eating half of a ham, cheese, lettuce, tomato, and mustard sandwich with my lunch juice so that I would have some energy throughout the day and my stomach would not be turning or growling. Some days, I replaced my half sandwich with a snack like fruit or vegetables. This was probably the strictest diet I had ever been on. But I learned a lot while I was on my juice diet.

My juice diet lasted two weeks, then I started becoming very busy and my diet sort of went out the window as diets usually do. I enjoyed my juice diet and truly never felt starved, in fact, I had a lot of energy! It was fun trying new juice recipes and trying different vegetables that I had never tried before, like beets!

My Favorite Recipes:

My Helpful Tips:

  • Make sure you have a healthy ratio of vegetables and fruits (not too many fruits than vegetables, and vise versa).
  • When pressing your fruit/vegetable into your juicer, press very very slowly this way you get the most juice as possible from your fruit/vegetable!
  • Once you’re finished making your juice, put it in the fridge for a while, I personally think juices taste better when they’re cold!
  • Put a plastic bag (example: a grocery bag) in the bin where the pulp comes out. After you finish making your juice, all you have to do is throw the plastic bag away (the plastic bag will catch all of the pulp). This makes cleaning your juicer a LOT easier!
  • Keep the scrubber that comes with the Hamilton Beach juicer (if you decide to get this juicer) it is fantastic for the cleaning process!
  • Read the instruction pamphlet that comes with your juicer!! It truly is the most helpful part!
  • Try out several different recipes until you find what you love the most! I personally love fruit juices with a few vegetables thrown in.
  • Research what else you can make with your juicer! There is more than what meets the eye!

My Favorite Fruits/Vegetables to Use:

  • Peaches
  • Tomatoes
  • Cucumbers
  • Granny Smith Apples
  • Carrots

Try a juice yourself, challenge yourself and become a better, healthier you!

xoxo, Megan

Food: Veggie Mac ‘N’ Cheese

veggie-mac

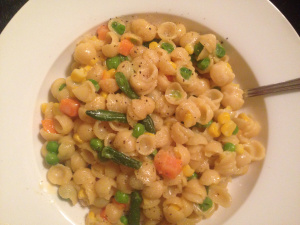
This is probably the easiest meal I’ve ever made, and it was delicious! As a college student, sometimes it’s difficult to find time to make a large, delicious meal from scratch. I found a recipe for Confetti Mac ‘N’ Cheese on Pinterest from http://www.peasandcrayons.com.

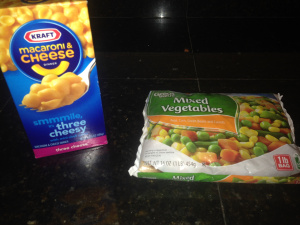
Veggie Mac N Cheese ingredients

What You’ll Need:

  • Frozen Mixed Vegetables
  • Kraft Macaroni & Cheese (I like the Three Cheese kind!)
  • Ingredients needed for Kraft recipe (milk and butter)

Instructions:

  • Make macaroni & cheese according to the directions on the box.
  • Heat frozen vegetables according to the directions on the bag.
  • Once both the macaroni & cheese and vegetables are ready, combine in a pot.
  • Serve & enjoy!

For the homemade recipe, go to http://www.peasandcrayons.com/2012/12/confetti-mac-and-cheese.html

xoxo, Megan